
在上篇博文中已经搭建好一个基础的可用的博客了,但是热爱折腾的我们怎么可能就此满足😎此文将介绍我的博客折腾之路~
环境
- 系统:Win10 64位
- Git: 2.17.0.windows.1
- Node.js: 8.11.1
- npm: 5.6.0
- Hexo: 3.7.1
- Next: 5.1.4
Next主题
选择一个自己可心的主题,会增强更博的动力哟😜
下载Next主题
在Git bash终端执行以下命令:
1 | git clone https://github.com/iissnan/hexo-theme-next themes/next |
本文使用的是Next: 5.1.4,目前已经更新至6.0,由于自己还是新手,基本搭建过程都是参考大神博客的,所以以后熟练了再更新吧😂
下载成功后可以在本地博客站点的主题文件夹/themes中除了默认的landscape文件夹,还多了一个next文件夹。
使用Hexo搭建博客时,由于在多个文件夹中存放了_config.yml配置文件,为表述方便,规定:
1.站点配置文件:sunflowerJY.github.io/_config.yml
2.主题配置文件:sunflowerJY.github.io/themes/next/_config.yml
启用Next主题
打开站点配置文件,找到theme字段,并将其值更改为 next。
1 | theme: next |
预览Next风格的本地博客
在Git bash终端执行:
1 | hexo s |
不知为何,我的hexo命令在站点文件夹以外的目录使用会报错找不到该命令,故我都会在站点根目录执行上述命令。
在浏览器中访问 http://localhost:4000/ 便可预览本地博客效果。❤️
修改Next主题的Scheme
Next主题的默认Scheme是Muse,效果如先上图。本博客使用的是Pisces,编辑主题配置文件中的Scheme字段修改Next主题的风格:
1 | scheme: Pisces |
修改网站的基本信息
修改站点配置文件:
1 | # Site |
修改微博底部添加访客数
themes/next/layout/_partials/footer.swig删除多余信息,保留如下信息:
1 | <div class="copyright">{# |
在上面copyright代码前添加:
1 | <script async src="https://dn-lbstatics.qbox.me/busuanzi/2.3/busuanzi.pure.mini.js"></script> |
在最后添加:
1 | <div class="powered-by"> |
添加头像
修改主题配置文件中的avatar,值设置为头像的链接:
1 | # Sidebar Avatar |
配置完成部署更新后便可以在HOME页看到自己的头像啦😃
设置网站图标
将图片在ico图片生成网站上分别生成16x16和32x32的图表,并改名为favicon-16x16-sunflower.ico和favicon-32x32-sunflower.ico,并放到/themes/next/source/images中,修改主题配置文件的small和medium字段:
1 | favicon: |
效果如图:

添加动态背景
Next主题版本》=5.1.1可以直接在主题配置文件修改:
1 | # Canvas-nest |
添加顶部加载条
修改主题配置文件将pace: false改为pace: true,还可以换不同风格的加载条:
添加分类和标签
分类(Categories)和标签(tags)能够很好得将博客文章进行分类管理,方便查阅归类。
添加分类
在博客文件夹下,执行:
1 | hexo new page categories |
自动在/source/categories/文件下创建index.md文件:
1 | --- |
如果有集成评论服务,分类页面也会带有评论。 若需要关闭的话,请添加字段 comments 并将值设置为 false,修改后的index.md:
1 | --- |
修改菜单:
在菜单中添加链接。编辑主题配置文件, 添加categories到menu中,如下:
1 | menu: |
添加标签
在博客文件夹下,执行:
1 | hexo new page tags |
自动在/source/tags/文件下创建index.md文件:
1 | --- |
如果有集成评论服务,标签页面也会带有评论。 若需要关闭的话,请添加字段 comments 并将值设置为 false,修改后的index.md:
1 | --- |
修改菜单:
在菜单中添加链接。编辑主题配置文件, 添加tags到menu中,如下:
1 | menu: |
修改标签图标
Next主题中设置了标签后,默认在文章最底部显示#,后面接文章所有的标签。总是觉得#这个标识丑丑的😂😂😂还是改一下吧
修改/themes/next/layout/_macro/post.swig:搜索rel="tag">#,将#换成<i class="fa fa-tag"></i>,效果图:
添加本地搜索
安装hexo-generator-searchdb,在站点的根目录下执行以下命令:
1 | npm install hexo-generator-search --save |
编辑站点配置文件,新增以下内容到任意位置:
1 | search: |
编辑主题配置文件,启用本地搜索功能:
1 | local_search: |
修改首页摘要
修改主题配置文件:
1 | auto_excerpt: |
修改文内链接式样
在/themes/next/source/css/_common/components/post/post.styl文末添加:
1 | // 文章内链接文本样式 |
其中,.post-body是为了不影响标题,选择p是为了不影响首页“阅读全文”的显示样式,颜色可以自己定义,效果如图:

添加emoji表情包
把原来的hexo渲染换成基于markdown-it的渲染:
1 | npm un hexo-renderer-marked --save |
在站点根目录node_modules\hexo-renderer-markdown-it\下安装markdown-it-emoji插件:
1 | npm install markdown-it-emoji --save |
编辑站点配置文件,添加如下内容:
1 | # markdown-it配置emoji表情包 |
然后就可以在写博的时候加上emoji表情啦😄
添加评论系统
最新战况:
2019年11月25日,还是用Valine评论系统,参考了各位大神的博客,使用valine-admin成功实现评论邮件提示功能。所以请直接跳转到添加Valine评论系统😁
2019年7月3日再次更换评论系统,配置了Valine根本不起作用,开源的东西太不稳定了吧😩
参考BlueLzy切换到Gitalk评论系统。
添加Gitalk评论系统
2019年7月2日更换评论系统,因为Gitment无人维护,出现无法登陆Github评论的Bug,故更换成Valine,其优点是无需登陆即可评论,配置简单,缺点暂时未发现。
添加Valine评论系统
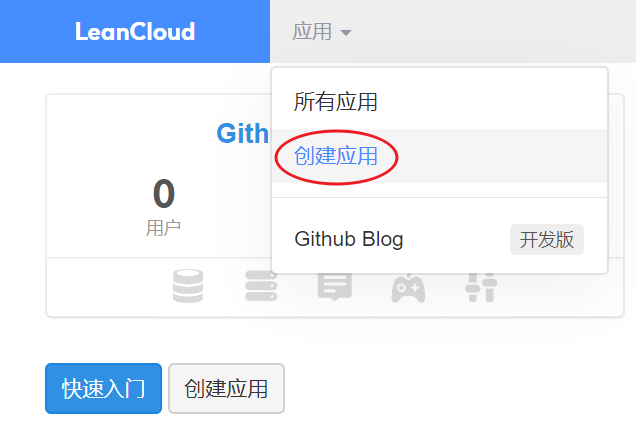
进行实名认证以及手机验证,实名认证需要等待一段时间,以自己为例,早上申请的,下午便收到实名认证成功的邮件。
创建应用:
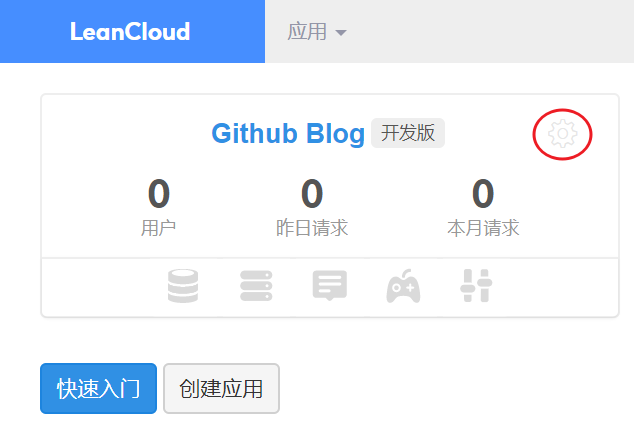
进入应用设置:
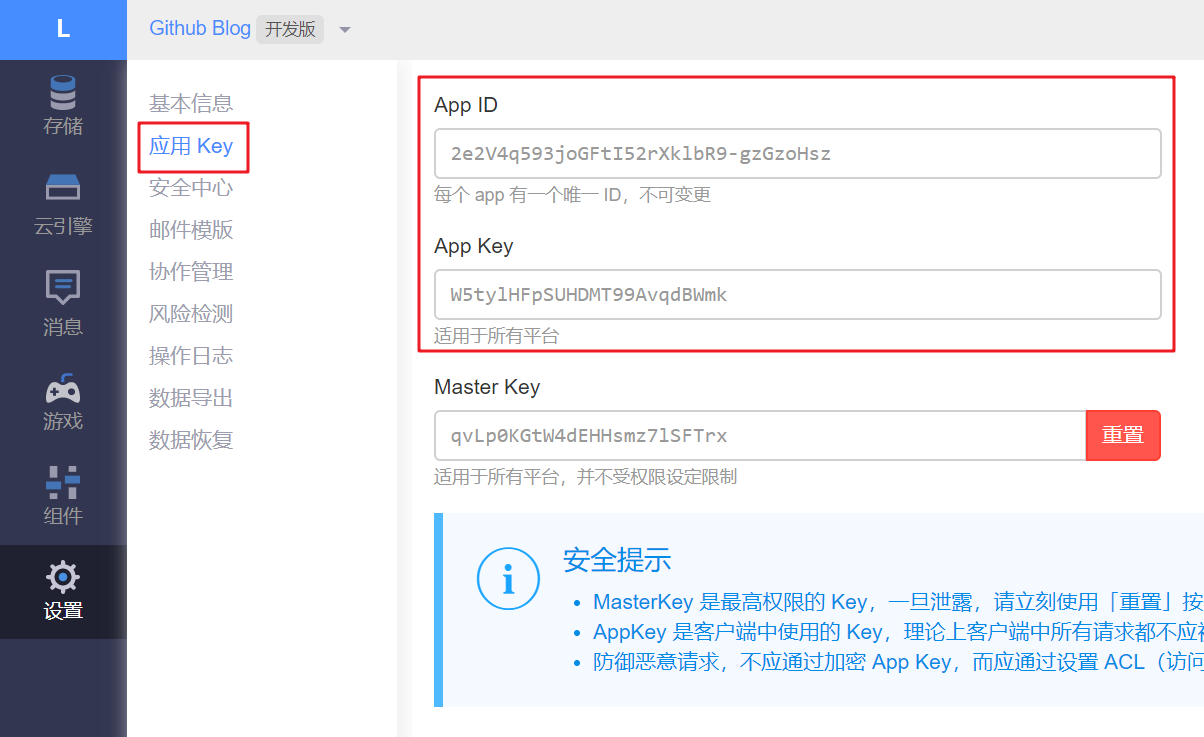
获取APP ID以及APP KEY:
修改主体配置文件themes\next_config.yml:
1 | valine: |
appid和appkey很重要,千万不要填错。
设置邮件提醒功能:
参考:https://valine.js.org/notify.html
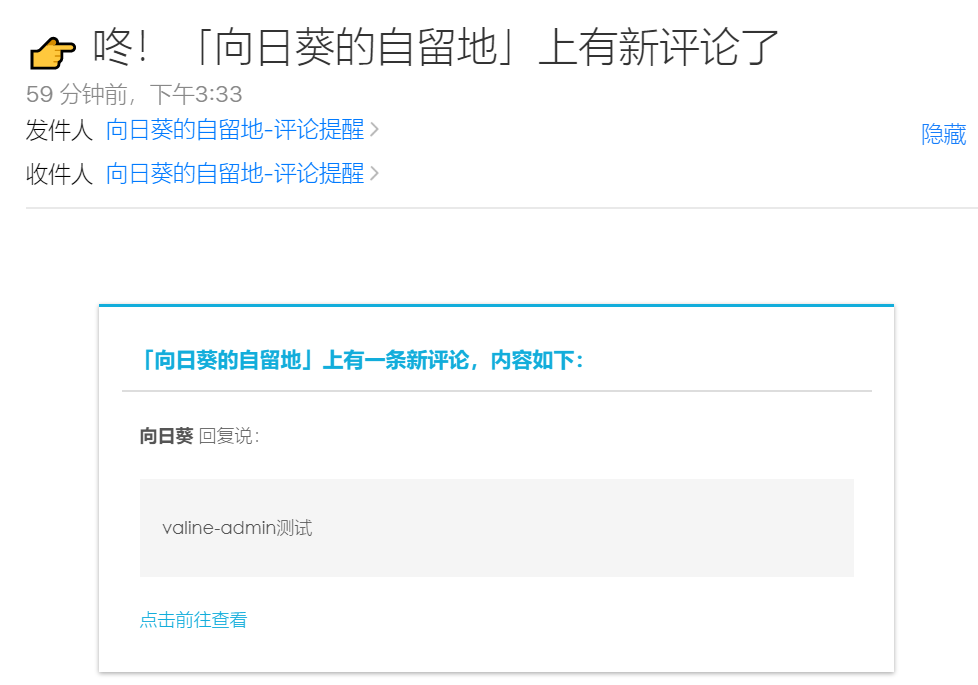
这块邮件提醒功能是Valine自带的,功能比较有限,我按照这个配置后,测试回复下是没有收到邮件提示的,后来看到valine官方推荐了Valine-Admin (by @zhaojun1998)的第三方增强版评论系统,按照步骤操作即可,这里不再赘述,可实现邮件接收评论提醒,并可直接连接跳转回复评论功能。
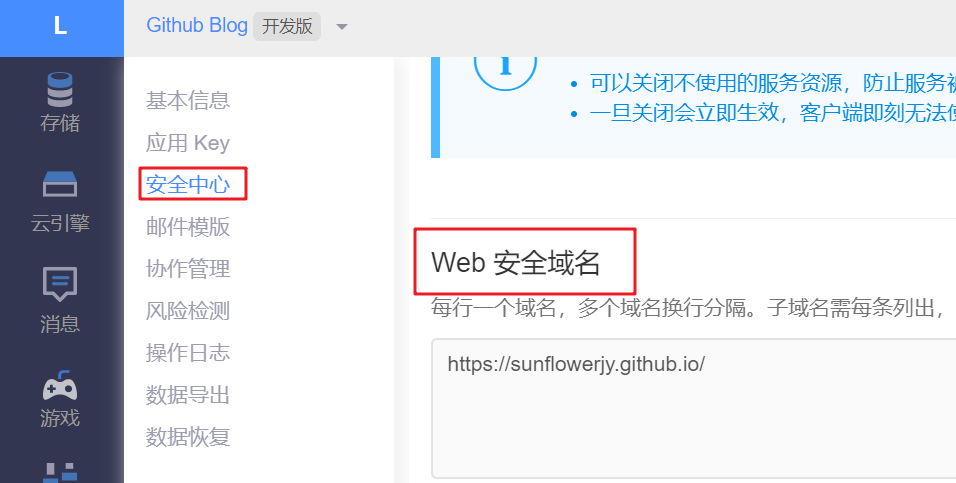
最后一步,将blog地址添加为安全域名:
添加Gitment评论系统
注册OAuth Application
登陆Github官网,进入https://github.com/settings/developers:
点击绿色Register a new application,填写以下内容:
点击绿色Register application,可获得Client ID、Client Secret。
创建Github仓库
创建一个仓库存放评论,仓库名:gitment-comments
修改主题配置文件
1 | # Gitment |
上述信息中除了github_user、github_repo、client_id、client_secret需要注意外,其他信息均可默认不改。
部署到博客查看效果:
1 | hexo d |
初始化本文的评论页
使用评论功能要登陆Github账号,登陆后点击初始化本文的评论页。
💔由于文章标题过长的原因,可能会报错Error:validation failed:
修改/themes/next/layout/_third-party/comments/gitment.swig文件中标亮的代码:
用文章的时间替代标题标识评论,避免了标题超出50个字符的问题。
管理评论
在gitment-comments的Issues中可以集中管理博客所有文章的评论。
添加萌宠
给孤独写博人来个伴儿吧😬这里有各种各样的宠物,pick一个心水的萌宠吧😉
安装模块:
1 | npm install --save hexo-helper-live2d |
下载一个宠物包,
以我博客中的黑猫为例:
1 | npm install live2d-widget-model-hijiki |
站点配置文件中添加以下字段:
1 | # live2d |
其中,注意model.use填写自己下载的宠物包名字。
Hexo-admin一站式写博部署
写第一篇博文的时候,总是纠结困惑排版的问题,网上也有很多推荐的Markdown编辑器,但是由于种种原因,和部署到Github Pages还是会有很多本地没有出现的问题。直到偶然之间,发现Hexo-admin这个插件,可以直接在本地http://localhost:4000/admin/ 写博客,并实时查看排版效果,比如我正在书写的这篇博文:
点击红圈的位置,可以实现实时本地预览:
一键式部署到Github Pages,还可以顺带部署信息,方便以后版本查阅:
是不是和Github Pages用起来无缝连接😉以下实现步骤:
安装插件:
1 | npm install --save hexo-admin |
本地运行,打开http://localhost:4000/admin/ :
1 | hexo server -d |
💔上述的Deploy可能第一次使用会报错,解决方案如下:
编辑站点配置文件,搜索admin字段修改如下:
1 | # hexo-admin admin.deployCommand |
在站点根目录下新建hexo-deploy.sh文件,内容如下:
1 | hexo g -d |
编辑站点根目录下node_modules/hexo-admin/deploy.js文件,修改标亮处:
1 | var proc = spawn((process.platform === "win32" ? "hexo.cmd" : "hexo"), ['d', '-g']); |
安装图床插件
目前上传图片至千牛网生成外链,复制到博客的html语言生成图片,知道有hexo-qiniu-sync这么一个插件能够化繁为简,去除重复劳动,使得在博客中添加图片更方便。但是一直安装配置存在问题,导致该插件无法使用,并且导致基本的hexo-clean、hexo s等命令也报错。
很无奈,未完待续。